Why “Leave It” Is a Life Skill, Not Just a Trick
A reliable “leave it” cue can feel like magic: your dog glances away from a dropped chicken bone, your cat stops stalking a houseplant, or your curious puppy backs off from a mystery object on the sidewalk. But it isn’t magic—it’s communication. “Leave it” teaches your pet that moving away from something tempting leads to something better from you.
At its heart, “leave it” means: “Do not investigate, sniff, lick, chase, pick up, or engage with that thing.” It is different from “drop it,” which means your pet already has something in their mouth and should release it. Both cues are useful, but “leave it” is often the safer first line of defense because it prevents the pet from grabbing the item in the first place.
This cue can help in everyday moments, such as walking past food scraps, ignoring wildlife, avoiding medication on the floor, leaving children’s toys alone, or steering clear of another pet’s bowl. It can also build your pet’s self-control and confidence because they learn they have choices—and choosing you pays off.
Best of all, teaching “leave it” does not require harsh corrections or intimidation. In fact, it works best when taught with patience, rewards, and trust. Whether you share your home with a bouncy dog, a clever cat, or another food-motivated companion animal, the foundation is the same: make the unwanted item less rewarding than listening to you.
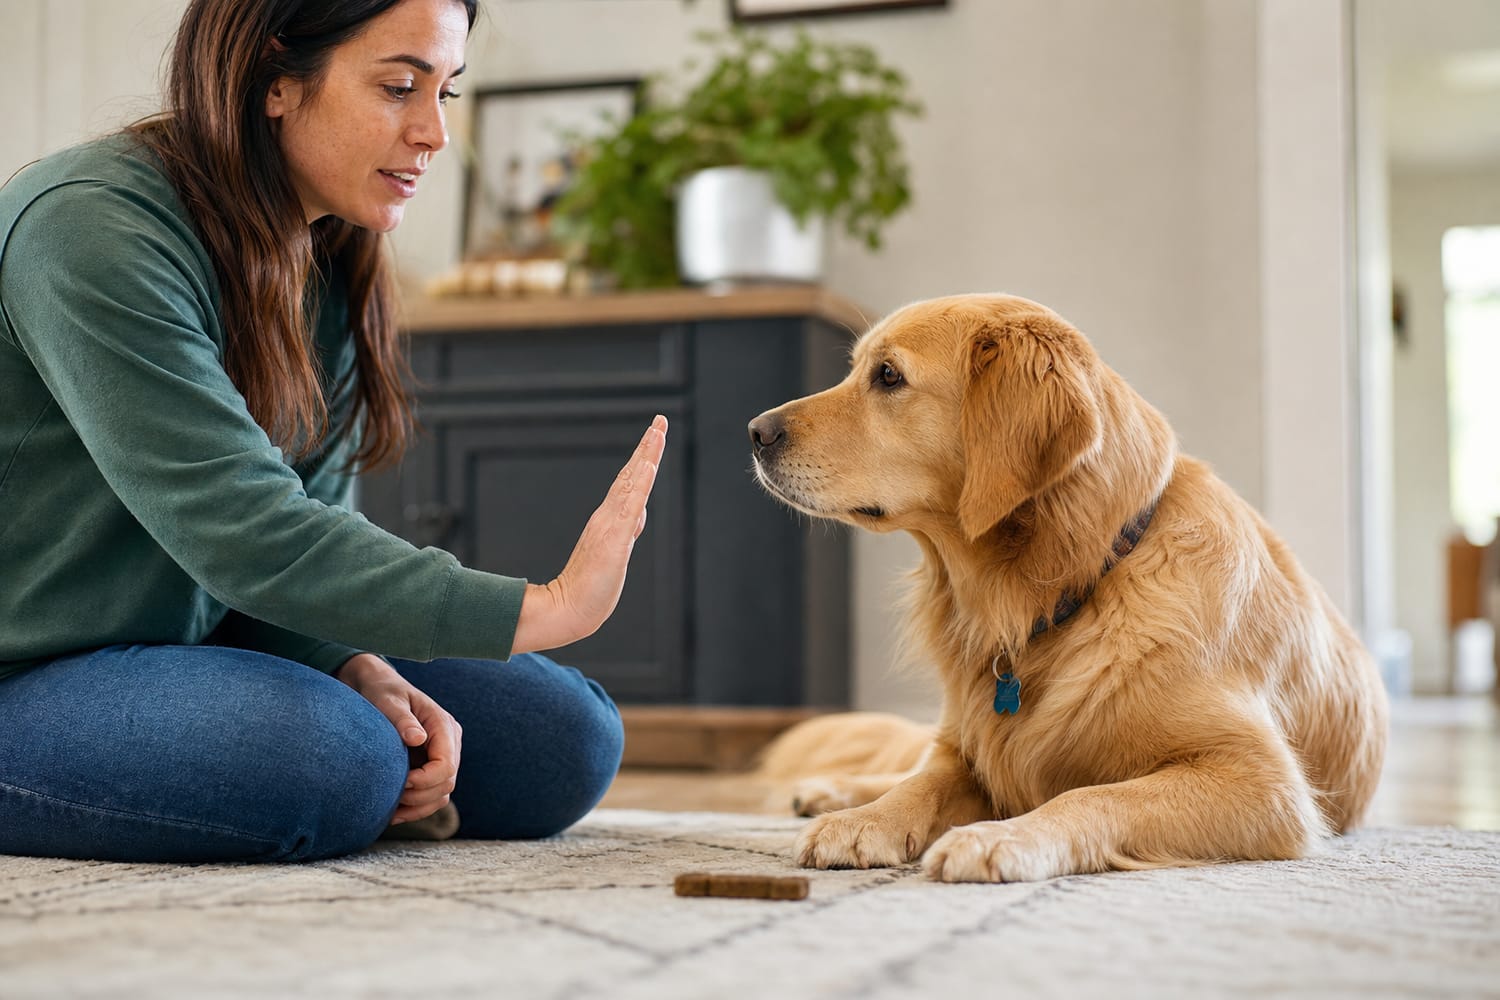
What You’ll Need Before You Begin
Before your first training session, gather a few simple supplies. You’ll need small, tasty treats your pet loves, such as pea-sized pieces of soft dog treats, cooked chicken, freeze-dried meat, or a favorite cat treat. You’ll also need a lower-value item—something your pet likes but will not lose their mind over. For many dogs, a piece of kibble works well. For cats, you might use a dry treat or toy, depending on what motivates them.
Choose a quiet space with few distractions. A living room, hallway, or kitchen can work well. Keep sessions short: three to five minutes is plenty for beginners. Multiple short sessions throughout the week are far more effective than one long session that leaves your pet tired or frustrated.
It also helps to decide on your marker word or sound. A marker tells your pet, “Yes, that was the right choice!” Many people use “yes!” in a cheerful voice. Others use a clicker. The marker should happen the instant your pet makes the correct decision, followed by a reward.
Finally, remember that rewards are not bribes. A bribe appears before the behavior to coax your pet into doing something. A reward comes after the behavior and reinforces a good choice. Over time, your pet learns that responding to “leave it” is worthwhile even when the world is full of fascinating smells, snacks, and surprises.
Step One: Teach the Concept in Your Hand
Start with the simplest version of the game. Place a low-value treat in your closed fist. Let your pet notice it. They may sniff, lick, paw, nibble, or stare. Stay calm and keep your fist closed. Do not scold, pull away dramatically, or repeat the cue over and over.
The moment your pet backs off—even slightly—mark the behavior with “yes!” and reward them with a better treat from your other hand. This is important: do not give them the treat from the closed fist. The lesson is that leaving the item alone makes something better appear from you.
Repeat this several times. You are looking for a shift in behavior. At first, your pet may try hard to get the treat. After a few repetitions, they may sniff once and then look away, or they may immediately glance at you. That is the beginning of “leave it.”
Once your pet reliably backs off from your closed fist, add the verbal cue. Say “leave it” one time, then present your closed fist. When they move away or look at you, mark and reward from the other hand. Keep your voice calm and upbeat. The cue should sound like information, not a threat.
If your pet becomes frustrated, make it easier. Use a less exciting item, reward faster, or take a break. Training should feel like a puzzle your pet can solve, not a test they keep failing.
Step Two: Open-Hand Practice
When your pet understands the closed-fist version, move to an open hand. Place a low-value treat on your palm and say “leave it.” Keep your hand open, but be ready to close it if your pet dives for the treat. If they try to take it, simply close your fist without scolding. When they back away, mark and reward with a better treat from your other hand.
As your pet improves, wait for a little more self-control. Maybe they look at the treat and then look at you. Maybe they sit. Maybe they step back. You don’t need to require a formal sit; the goal is disengagement. Reward the decision to leave the item alone.
This step teaches your pet that “available” does not always mean “for me.” That is a powerful lesson. Many tempting things in life are visible and reachable, from picnic crumbs at the park to cat food on a counter. Your pet is learning that your cue helps them navigate those temptations successfully.
For cats, keep in mind that training may look quieter and more subtle. A cat may pause, flick an ear, look away, or choose not to pounce. Mark and reward those small choices. Cats can learn cues beautifully when sessions are short, respectful, and rewarding.
Step Three: Move the Item to the Floor
The floor changes everything. To many pets, an item on the floor feels fair game. This is why you should make the exercise easier again when changing the setup.
Place a low-value treat on the floor and cover it with your hand. Say “leave it.” If your pet backs off or looks at you, mark and reward with a better treat from your other hand. If they try to grab it, keep it covered. Stay patient.
Next, uncover the treat for a second. If your pet leaves it alone, mark and reward. If they move toward it, cover it again. You are not punishing them; you are simply preventing them from rehearsing the behavior you don’t want.
Gradually increase the time the treat stays uncovered. Then practice standing up, placing the item near your foot so you can cover it quickly if needed. Eventually, you can drop a treat on the floor, say “leave it,” and reward your pet for ignoring it.
Always pick up the “leave it” item at the end rather than allowing your pet to eat it. This keeps the meaning clear: “leave it” means that item is not available. Your pet can still receive wonderful rewards from you, but not the forbidden object.
Step Four: Add Real-Life Distractions Gradually
Once your pet can leave treats in your hand and on the floor, begin practicing with everyday objects. Try a sock, a toy, a food wrapper, a leaf, or an empty bowl. For dogs, you can practice during walks with harmless distractions at a distance. For cats, you might practice near a plant they like to sniff or a toy they want to chase.
The key is distance. If your dog lunges for a sandwich crust two inches from their nose, they are probably too close to think clearly. Start several feet away from distractions and reward them for noticing the item and then turning back to you. Over time, you can work closer.
Use high-value rewards in harder environments. Your pet is making a bigger effort when they ignore a squirrel, another animal’s food, or a smelly object outside. Pay them well. A cheerful “yes!” followed by something delicious helps build a strong habit: when I hear “leave it,” I turn away and check in with my person.
You can also practice with movement. Roll a toy slowly past your dog and cue “leave it.” Drag a wand toy gently for a cat, then reward them for pausing when asked. Keep the challenge fair. Fast movement triggers chase instincts, so build up slowly.
Training is not about eliminating natural curiosity. Pets are supposed to be interested in the world. “Leave it” simply gives them a safe, understandable way to disengage when something is off-limits.
How to Use “Leave It” on Walks and in the Home
In real life, timing matters. Say “leave it” as soon as your pet notices the item, not after they already have it in their mouth. If you see your dog lock eyes on a chicken bone, cue early, then move away and reward generously when they turn with you.
On walks, pair “leave it” with movement. Say the cue, encourage your dog in a happy voice, and guide them away from the distraction. When they follow, reward. If needed, create distance first. A shorter leash can help with safety, but avoid yanking or jerking. The goal is to help your dog succeed, not startle them into stopping.
At home, use “leave it” for dropped food, laundry, trash, houseplants, or fragile items. If the environment is full of temptations, management matters. Use baby gates, closed doors, covered trash cans, and pet-safe storage. Training is powerful, but it should not be your only safety plan.
For multi-pet homes, “leave it” can be especially helpful around food bowls, toys, and resting spaces. Reward your pet for turning away from another animal’s meal or favorite bed. This supports peace in the household and reduces conflict.
If your pet has a history of guarding food or objects—growling, stiffening, snapping, or running away with items—consult a qualified positive-reinforcement trainer or veterinary behavior professional. Object guarding is treatable, but it requires careful, compassionate handling.
Common Mistakes and How to Avoid Them
One common mistake is repeating the cue: “Leave it, leave it, leave it!” This can teach your pet that the first cue is optional. Say it once, then help them succeed by creating distance, covering the item, or making the task easier.
Another mistake is making the forbidden item too exciting too soon. If your dog is obsessed with cheese, don’t start with cheese on the floor. If your cat cannot resist a fluttering feather toy, don’t begin with rapid movement. Start easy and climb the ladder gradually.
Some people accidentally reward the wrong thing. For example, if your pet grabs the item and then receives attention, a chase game, or a treat, they may learn that grabbing things is fun. Instead, set up practice so they cannot access the item, and reward them for disengaging before contact.
Avoid using “leave it” as a constant nag. If you say it all day long, your pet may tune it out. Use it when you can follow through and reward. In situations where you cannot train, manage the environment instead.
Finally, do not punish curiosity. Harsh corrections can create fear, confusion, or sneaky behavior. A pet who is afraid to explore around you may still grab dangerous items when you are not looking. A pet who trusts you is more likely to turn toward you for guidance.
Making the Cue Strong for Life
A reliable “leave it” is built through practice, patience, and generosity. Once your pet understands the cue, keep reinforcing it in everyday life. You do not need to reward with food every single time forever, but continue to surprise your pet with great payoffs—especially for difficult choices.
Use life rewards too. If your dog leaves a boring object and looks at you, they might earn permission to sniff a safe tree. If your cat leaves a plant alone, they might get a treat, praise, or a play session. Rewards can be anything your pet genuinely enjoys.
Practice in different rooms, at different times of day, with different objects, and around different distractions. Pets do not automatically generalize well. A dog who understands “leave it” in the kitchen may need practice to understand it on a busy sidewalk. A cat who leaves one plant alone may need guidance with another.
Most importantly, celebrate progress. The first glance away from a treat, the first step back from a toy, the first successful sidewalk “leave it”—these are meaningful moments. They show your pet is learning to trust your guidance and make safe choices.
Teaching “leave it” is more than training a cue. It is building a shared language. It says, “I’ll help you navigate this world.” And your pet’s response says, “I’m listening.” That connection is what makes training so rewarding—for both ends of the leash, the clicker, or the treat pouch.